Some of the links in this post are “affiliate links.” This means that I will receive a commission if you click on the affiliate link and purchase an item through that link.
In honor of Thanksgiving, I am sharing a fun DIY project I made for the holiday. A few days ago, I mentioned that I cut a few pieces of cardboard to use for my crafts. I already made one sign for my bedroom, and this new sign will be in my kitchen for Thanksgiving.

Follow the instructions below for inspiration.
Supplies:
- Cardboard
- Cardstock
- Artificial Flowers
- Glue Stick
- Jute Rope
- Glue Gun
- Cricut Explore Air
- Glitter Vinyl
- Transfer Tape
Instructions:
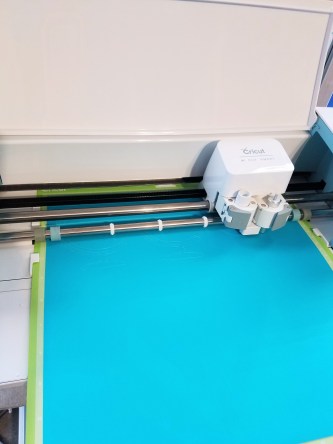
- I used my Cricut to create the letters and shapes for the sign. The Cricut Explore Air is an electronic cutting machine that helps you make invitations, cards, decorations, and hundreds of other projects.

- All I had to do was design a vase on the Cricut website, then let the machine do all the cutting for me. I then adhered the pieces together with a glue stick.


- I applied a couple of adhesive foam dots to the back of the paper vase, then placed it in the middle of the cardboard.


- I also used the cutting machine and glitter vinyl to make letters for the sign. The transfer tape adhered the vinyl letters to the cardboard.

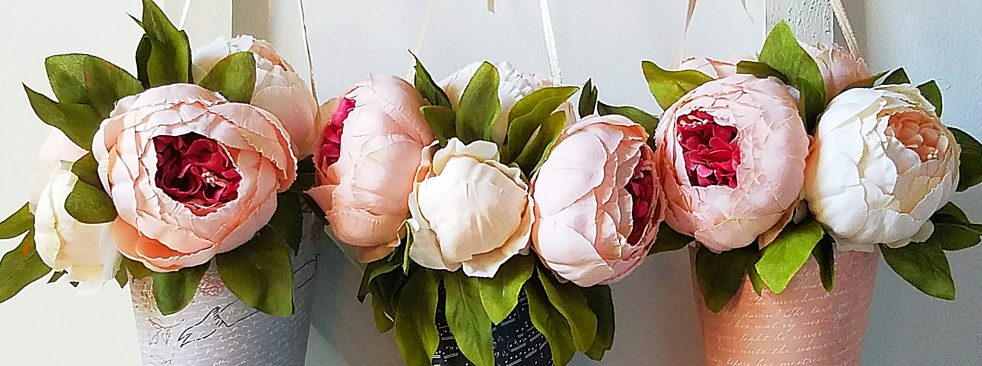
- Since this project is for Thanksgiving, I bought a bouquet of Fall colored flowers to add to the sign.


- For the final step, I took some jute rope and glued it around the cardboard.


How awesome is this sign! I can’t wait to show it off for Thanksgiving.
Wow! Very well done.
Thank you!
Lovely decoration 🙂
Thank you!